Alright–you’ve just invested in a new roof to protect your home from the elements, only to discover unsightly ceiling damage shortly after the roof replacement. Frustrating, right? Yet, this is a reality many homeowners face. Understanding how to identify and fix ceiling damage after a roof replacement is crucial to maintaining the integrity of your home and preventing further damage.
In this blog, we’ll guide you through the common causes of ceiling damage after roof replacement, signs to look out for, and steps to fix and prevent such damage. With this knowledge, you’ll be better equipped to address any issues that may arise and protect your home for years to come.
Key Takeaways
- Proper installation and maintenance of flashing, attic ventilation systems, and a reputable roofing contractor are essential to prevent ceiling damage after roof replacement.
- Signs of ceiling damage include discoloration, cracks & sagging, and mold growth.
- Assess the damage before contacting your roofer for repair or replacement. Safeguard interior during project to minimize risk of Damages.
Common Causes of Ceiling Damage After Roof Replacement

Ceiling damage after a roof replacement can be a homeowner’s worst nightmare. The three main culprits behind ceiling damage are improper installation, damaged or missing flashing, and poor ventilation. Unaddressed, these issues can lead to a leaky roof in your new roof, causing significant damage to your ceiling and potentially impacting your home’s structural integrity.
Further along, we’ll expand on each cause and offer advice on damage prevention.
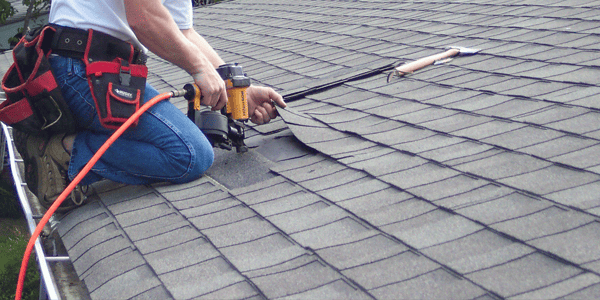
Improper Installation
When it comes to roof installation, cutting corners is a recipe for disaster. Improper installation can lead to leaks, which in turn cause unsightly ceiling damage. That’s the reason hiring a trustworthy roofing contractor who adheres to correct procedures and guidelines is of utmost importance. A well-installed roof ensures that all its components, such as shingles, underlayment, and flashing, are securely sealed to prevent water infiltration. With a properly roof installed, you can have peace of mind knowing that your home is protected.
Unfortunately, even the best roofing contractor can make mistakes. If you suspect that your ceiling damage is a result of improper roof installation or roof leaks, don’t hesitate to contact the roofing company and request a thorough inspection and necessary repairs. Remember, a durable roof is the first line of defense against water damage in your home.
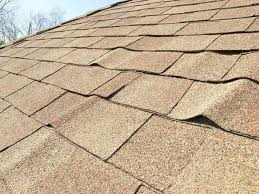
Damaged or Missing Flashing
Roof flashing is a thin metal material installed on a roof to guide water away from critical points, such as where shingles meet or around roof features like skylights. Damaged or missing flashing can cause water infiltration, leading to ceiling damage after roof replacements. To avoid this issue, proper installation and maintenance of flashing, including the use of roofing cement where necessary, is required.
Regularly inspect the flashing for signs of damage or improper installation, such as gaps around nail heads or missing pieces. If you notice any issues, take immediate action to repair or replace the damaged or missing flashing. By addressing these problems promptly, you’ll prevent further damage to your ceiling drywall, including potential nail pops, and safeguard your home from water damage.
Poor Ventilation
Proper attic ventilation is critical to maintaining a healthy home environment and preventing ceiling damage. Inadequate ventilation can result in:
- Moisture buildup, which can be detrimental to your ceiling and lead to issues like mold growth and structural damage
- Condensation and swelling of the decking during colder months
- A wavy appearance of the roof
Avoiding these issues requires having a properly ventilated attic, equipped with systems like ridge vents, soffit vents, or gable vents. Regularly inspect these vents for blockages or damage and address any issues promptly. By maintaining proper attic ventilation, you’ll protect your home from moisture-related damage and ensure the longevity of your new roof.
Signs of Ceiling Damage After Roof Replacement

Having covered the common causes of ceiling damage after roof replacement, we’ll now shift our focus towards the warning signs to watch for. Detecting these signs early can help you address the problem quickly and prevent further damage.
The main signs of ceiling damage include discoloration, cracks and sagging, and mold growth. In the subsequent sections, we will examine each sign in detail and provide guidance on their identification and resolution.
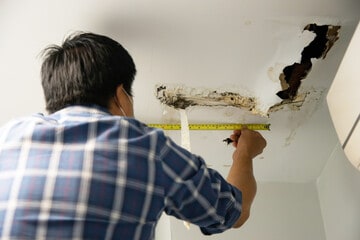
Discoloration
Discoloration on your ceiling is a telltale sign of water damage. Stains or dark streaks on the ceiling may indicate that water is seeping through the roof and causing damage to the drywall. This discoloration can appear around roof penetrations, such as vents or skylights, or in areas where the roof meets walls or other surfaces.
If you notice discoloration on your ceiling, don’t ignore it. Inspect your roof for leaks and address the issue as soon as possible. Repairing the leak will prevent further water damage to your ceiling and protect the integrity of your home.
Cracks and Sagging
Cracks and sagging in your ceiling can indicate serious issues, such as water damage or structural problems. These signs may appear after a roof replacement if the installation was not done correctly or if there are underlying structural issues. Cracks can be small and barely noticeable at first, but over time, they can worsen and lead to significant damage.
If you notice cracks or sagging in your ceiling, don’t hesitate to consult a professional for assessment and repair. Addressing these issues early on can save you time and money in the long run, and help maintain the structural integrity of your home.
Mold Growth
Mold growth on your ceiling can be more than just an unsightly nuisance; it can also pose serious health risks, including respiratory issues and skin irritation. Mold thrives in damp environments, so its presence on your ceiling may indicate water damage resulting from a roof leak or poor ventilation.
Effective mold elimination requires tackling the root cause – the source of moisture. Inspect your roof for leaks or ventilation issues and take the necessary steps to resolve them. Once the root cause is addressed, use a mold removal product to remove the mold from your ceiling.
Taking these steps will not only protect your home but also safeguard the health of your family.
How to Fix Ceiling Damage After Roof Replacement
Once ceiling damage is identified post roof replacement, swift action is necessary to rectify the issue. What’s next? Fixing the damage involves assessing the extent of the problem, contacting your roofing contractor, and repairing or replacing any damaged areas.
In the subsequent sections, we will guide you through the necessary steps for restoring your ceiling and safeguarding your home.
Assess the Damage
The first step in addressing ceiling damage is to assess the extent and severity of the problem. Examine the area thoroughly, looking for signs like discoloration, cracks, sagging, and mold growth. Document the damage with photographs and videos, which can be helpful if you need to file an insurance claim or pursue legal action.
Evaluating the damage will help you determine whether professional help is required or if you can handle the repairs yourself. For minor issues, you may be able to fix the problem with DIY methods, such as patching small cracks or drying out a damp area. However, for more significant damage or structural concerns, it’s best to consult a professional contractor.
Contact Your Roofing Contractor
Once you’ve assessed the damage, it’s time to contact your roofing contractor to discuss the issue and determine if it’s covered under warranty or if additional repairs are needed.
- Be sure to provide them with the photos and videos you took during the assessment, as this will help them understand the extent of the problem and determine the best course of action to fix the roof leak.
- Keep in mind that not all damage may be covered by the roofing warranty.
- For items not covered, such as furniture or appliances, you may need to contact your home insurance provider.
- Communication is key during this process, so make sure to maintain an open dialogue with your contractor and insurance provider to ensure the issue is resolved efficiently.
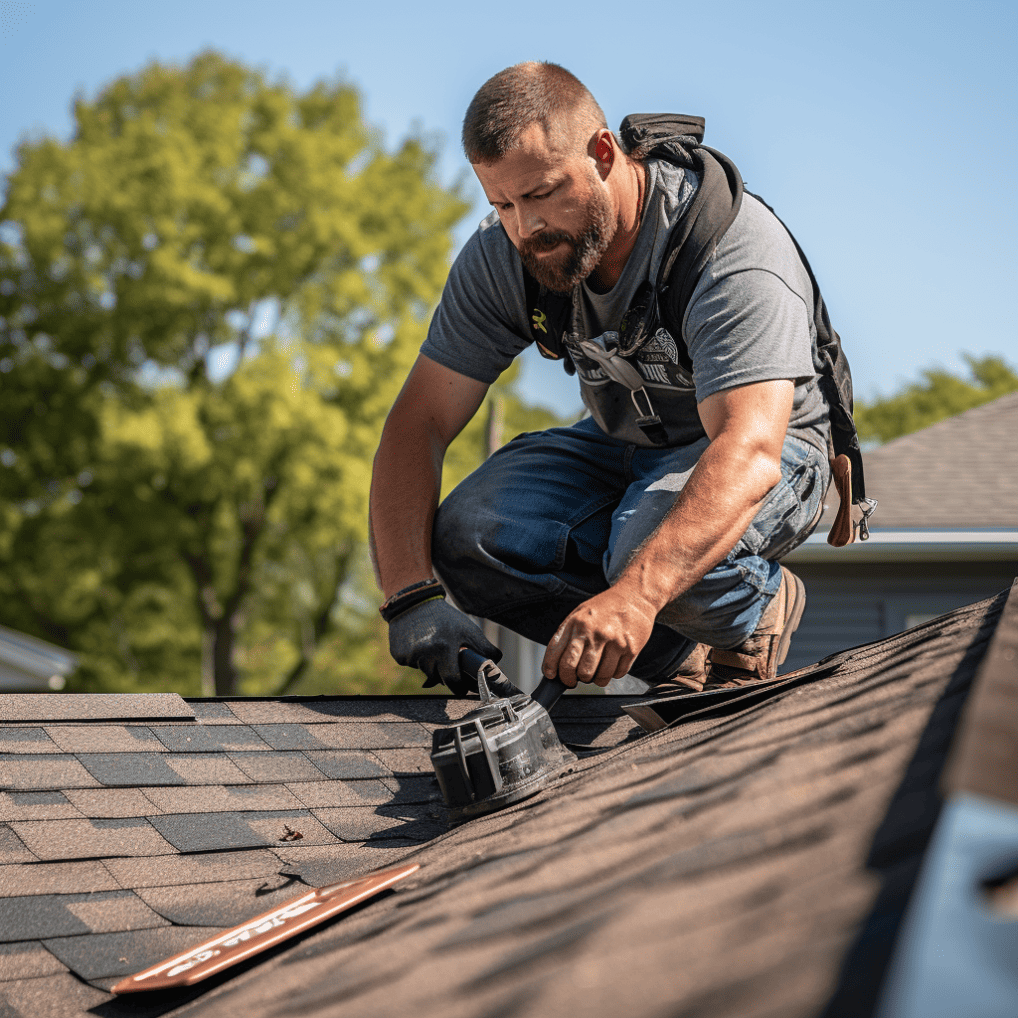
Repair or Replace Damaged Areas
Now that you’ve assessed the damage and contacted your roofing contractor, it’s time for roof repair or to replace the damaged areas of the ceiling. Depending on the extent of the damage and the nature of the roofing material, you may need to patch up small gaps, replace missing or torn shingles, or restore damaged flashing.
If you’re comfortable with DIY repairs, you can attempt to fix minor issues yourself. However, for more significant damage or if you’re unsure about the repair process, it’s best to enlist the help of a professional contractor. They can ensure the repairs are done correctly and prevent further damage to your home.
How to Prevent Ceiling Damage During Roof Replacement
Taking steps to prevent ceiling damage during roof replacement is vital for home protection and the avoidance of expensive future repairs. By choosing a reputable roofing contractor, communicating with them, and protecting your interior, you can minimize the risk of ceiling damage during the roof replacement process.
Subsequent sections will provide a more in-depth exploration of each prevention strategy.
Choose a Reputable Roofing Contractor
The initial and most critical step in preventing ceiling damage during roof replacement is choosing a reputable roofing contractor. Ensure that the contractor is licensed, insured, and bonded. Research their reputation by examining their website, online reviews, and references from past customers.
Obtaining a written estimate from the contractor can also help you understand the costs and components involved in the project. By choosing a reputable contractor with a proven track record and positive reviews, you can rest assured that your roof replacement will be carried out with quality workmanship and minimal risk of ceiling damage.
Communicate with Your Contractor
Communication with your contractor is key to preventing ceiling damage during roof replacement. Here are some steps you can take to ensure the safety of your ceiling:
- Discuss your concerns and expectations regarding the project with your contractor.
- Ensure that they follow proper procedures and guidelines to minimize the risk of damage.
- Inquire about their methods for protecting your ceiling during the roof work.
- Ask what preventive measures they will take to avoid any potential damage.
By following these steps and maintaining open communication with your contractor, you can help prevent ceiling damage during roof replacement.
Don’t be afraid to ask questions and clarify any doubts you may have. By maintaining an open dialogue with your contractor, you can ensure that they understand your needs and expectations, ultimately leading to a successful and damage-free roof replacement.
Protect Your Interior
Protecting your home’s interior during roof replacement can make a significant difference in preventing ceiling damage. Take steps to cover furniture, remove valuables, and seal off rooms to minimize dust and debris during the roofing process.
Use plastic sheeting or tarps to cover:
- walls
- floors
- ceilings
- furniture
- other items in the room
This protection can help minimize any potential damage caused by falling debris or dust during the roof replacement process. By taking these precautions, you’ll ensure a smoother, damage-free roof replacement experience.
Your Roof is Your Home’s First Line of Defense
Identifying and fixing ceiling damage after roof replacement is essential to maintaining the integrity of your home and preventing further damage. By understanding the common causes of ceiling damage, recognizing the signs, and taking the necessary steps to fix and prevent it, you can ensure that your new roof serves its purpose and protects your home for years to come.
Remember, a well-maintained roof is your home’s first line of defense against the elements. By choosing a reputable roofing contractor, communicating with them, and protecting your interior during the roof replacement process, you can minimize the risk of ceiling damage and enjoy the peace of mind that comes with a properly installed and maintained roof.
Frequently Asked Questions
Can a new roof cause nail pops in ceiling?
Yes, a new roof can cause nail pops in ceilings, especially those with cathedral or vaulted design. Such nail pops are usually the responsibility of the homeowner for repair.
How much damage can a roof leak cause?
Unchecked roof leaks can weaken structural components of your home, such as rafters and roof decking, as well as cause insulation damage. The contents of your attic and the ceiling itself may also be stained and damaged, with restoration costs for ceiling repairs starting at $350 and going up to $2,000. Leaking roofs can be a costly problem to fix, but it is important to address the issue as soon as possible to avoid further damage. Taking the time to inspect your roof and repair any leaks can save you money in the long
Can a leaky roof cause electrical problems?
Yes, a leaky roof can lead to electrical issues when water seeps into the home’s electrical systems. Homeowners should be aware of the risks and look out for signs of electrical damage from their leaking roof. Water damage can cause a variety of electrical problems, including short circuits, corrosion, and even fire. It’s important to inspect the roof regularly and repair any leaks as soon as possible. If the
Is it safe to sleep in a room with a leaking ceiling?
Due to potential safety hazards, it is not safe to sleep in a room with a leaking ceiling.
What are the common causes of ceiling damage after roof replacement?
Common causes of ceiling damage after roof replacement include improper installation, damaged or missing flashing, and inadequate ventilation.